Ciao! Homemade Gluten-Free Pizza Rolls bring me back to my childhood kitchen in Tuscany, where the scent of slow-simmered tomato sauce and melting mozzarella filled the air. But after discovering my gluten intolerance years later, those beloved pizza nights felt like a chapter I had to close. Until I didn’t.
Reimagining those rolls, soft and cheesy with crisp golden edges, into a gluten-free version took trial and error. But the moment I pulled out a tray that tasted just like home? Magic. Now these cozy, savory rolls are a staple in my kitchen every fall, when the evenings get shorter and the oven beckons us to gather.
In this recipe post, we’ll go over everything you need to make these Homemade Gluten-Free Pizza Rolls a family favorite. I’ll walk you through ingredients, simple steps, variations (dairy-free too!), and how to store them without losing that irresistible texture. This is a comfort food classic, just with a gluten-free twist.
Whether you’re craving game-day snacks or a cozy weeknight dinner idea, these rolls are here to prove you don’t need wheat to enjoy the best of Italian flavors.
Homemade Gluten Free Pizza Rolls
Equipment
- mixing bowl
- parchment paper
- Rolling Pin
- Sharp knife
- Baking dish or tray
- Pastry brush
Ingredients
- 2 ¼ cups gluten-free all-purpose flour (with xanthan gum)
- 1 tbsp dry active yeast
- 1 tsp sugar
- 1 cup warm milk or plant milk
- 1 egg or flax egg
- 2 tbsp olive oil
- ½ tsp salt
- ½ cup marinara or pizza sauce
- 1 cup shredded mozzarella or dairy-free cheese
- ½ tsp dried oregano
- mini pepperoni, sautéed mushrooms, or diced bell peppers (optional)
- 1 tbsp olive oil (for brushing)
- garlic powder (for brushing)
- grated parmesan or nutritional yeast (for brushing)
Instructions
- In a small bowl, mix warm milk, sugar, and yeast. Let sit 10 minutes until foamy.
- In a large bowl, combine flour, salt, and the yeast mixture. Add egg and olive oil. Mix into a sticky dough.
- Cover and let rise in a warm spot for 45–60 minutes until slightly puffed.
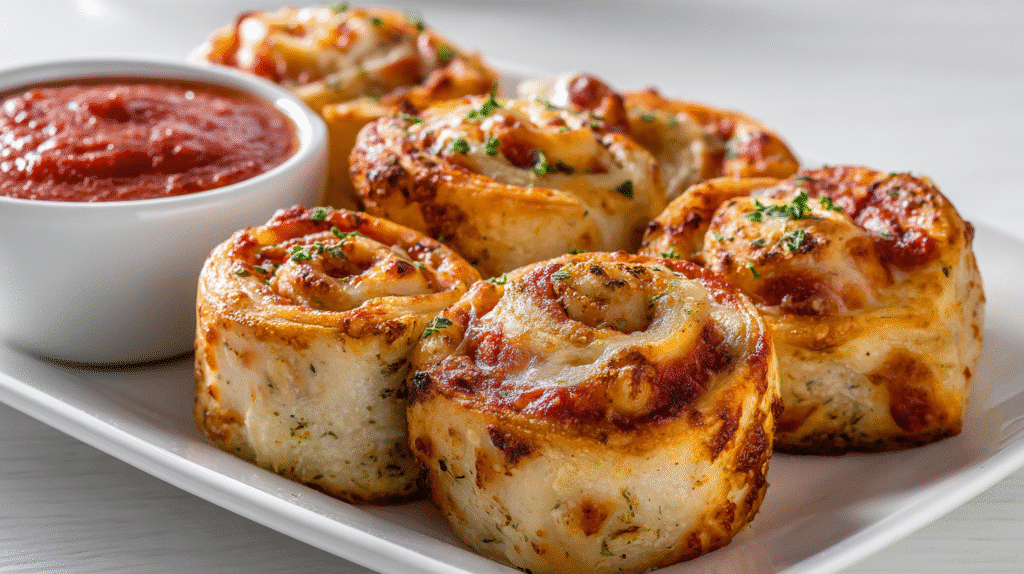
- Transfer dough to parchment paper. Roll into a rectangle ½ inch thick. Add sauce, cheese, herbs, and optional toppings.
- Roll dough into a log using parchment to guide. Slice into 10–12 rolls.
- Place rolls in a greased baking dish or on lined tray. Brush with olive oil and sprinkle with garlic powder and parmesan or nutritional yeast.
- Bake at 375°F (190°C) for 20–25 minutes until golden brown.
- Cool for 10 minutes before serving warm.
Notes
Nutrition
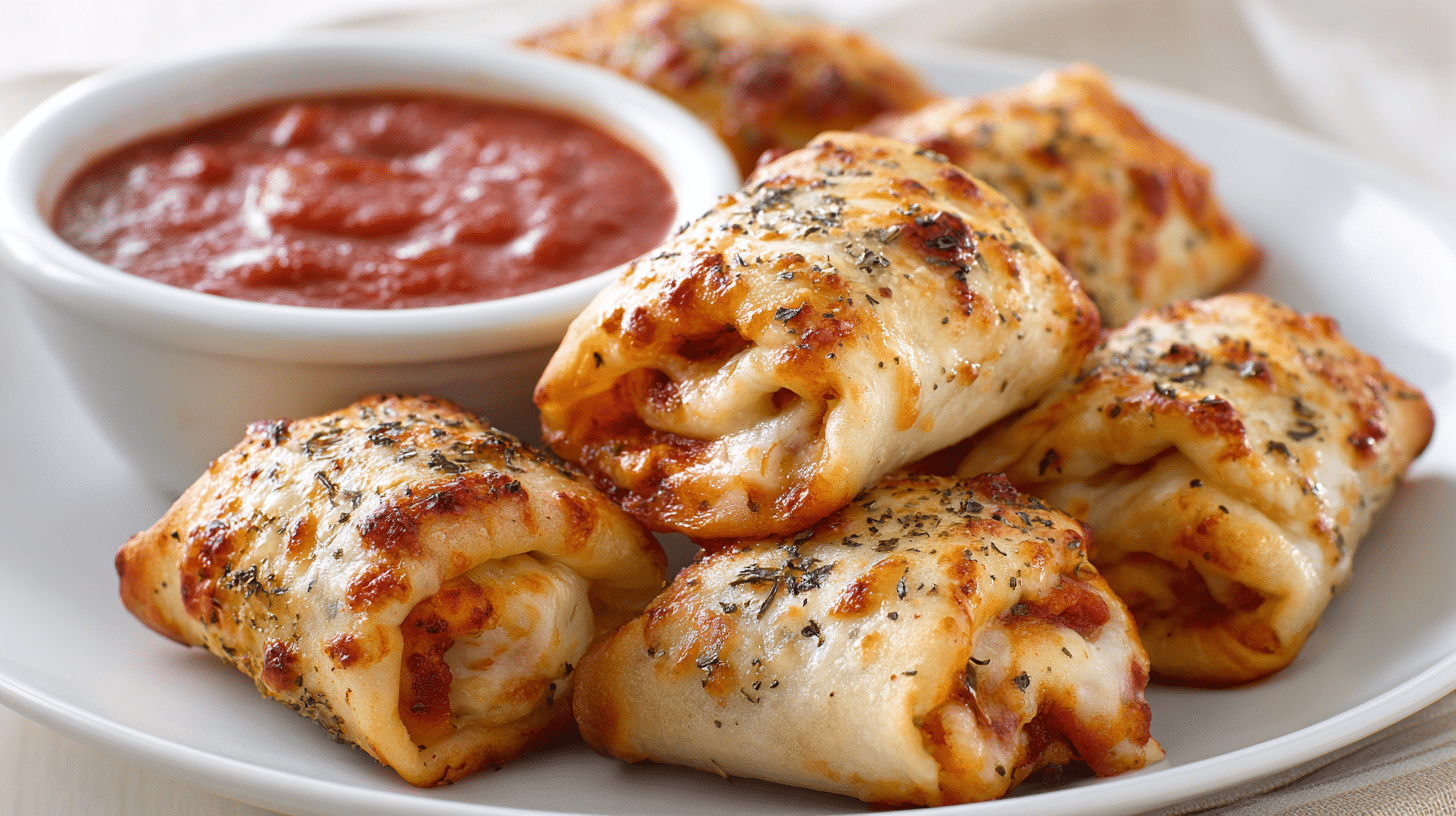
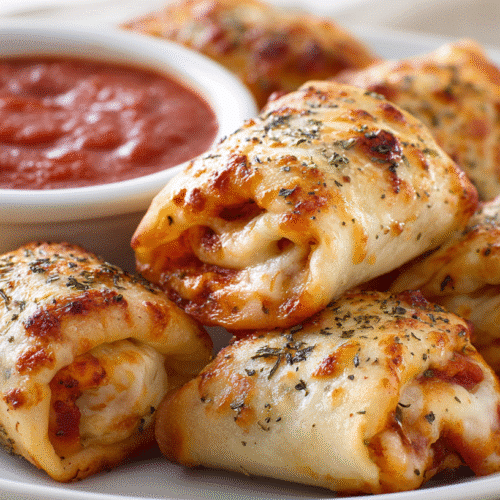
Ingredients for Homemade Gluten-Free Pizza Rolls
To make these soft and chewy rolls filled with gooey cheese and flavorful sauce, you’ll need pantry-friendly gluten-free ingredients. Here’s what you’ll need:
For the dough:
- 2 ¼ cups gluten-free all-purpose flour (with xanthan gum)
- 1 tbsp dry active yeast
- 1 tsp sugar
- 1 cup warm milk (or plant milk)
- 1 egg (or flax egg)
- 2 tbsp olive oil
- ½ tsp salt
For the filling:
- ½ cup marinara or pizza sauce
- 1 cup shredded mozzarella (or dairy-free cheese)
- ½ tsp dried oregano
- Optional: mini pepperoni, sautéed mushrooms, or diced bell peppers
For brushing:
- 1 tbsp olive oil
- Garlic powder
- Grated parmesan or nutritional yeast
If you enjoy bread-like gluten-free recipes, you might also love my Soft Homemade Gluten-Free Bread or these Gluten-Free Dinner Rolls that pair perfectly with soups.

How to Make Gluten-Free Pizza Rolls: Step-by-Step Instructions
Homemade Gluten-Free Pizza Rolls are easier than you think! Follow these beginner-friendly steps:
1. Activate the Yeast
In a small bowl, mix warm milk, sugar, and yeast. Let it sit for 10 minutes until foamy. This step helps ensure your rolls rise beautifully.
2. Make the Dough
In a large mixing bowl, combine gluten-free flour, salt, and the yeast mixture. Add in egg and olive oil. Mix until a sticky dough forms. Gluten-free dough won’t feel like wheat-based dough, it’s softer and needs less kneading.
3. Let It Rise
Cover the bowl with a towel and let the dough rise in a warm spot for 45–60 minutes. It won’t double like regular dough but should puff slightly.
4. Roll and Fill
Transfer the dough onto parchment paper. Use oiled hands or a rolling pin to spread it into a rectangle (about ½ inch thick). Spread sauce evenly, sprinkle cheese, add herbs, and optional toppings.
5. Roll Up and Slice
Gently roll the dough into a log using the parchment to guide it. Slice into 10–12 rolls with a sharp knife.
6. Bake
Place rolls in a greased baking dish or on a parchment-lined tray. Brush with olive oil, sprinkle with garlic powder and parmesan or nutritional yeast. Bake at 375°F for 20–25 minutes until golden brown.
7. Cool Slightly and Serve
Let cool for 10 minutes before serving warm. The aroma will be irresistible.
For a side dish pairing, consider these Gluten-Free Mozzarella Sticks or try it alongside a fresh salad and my Lemon Pepper Shrimp Stir-Fry for balance.
Tips for Success with Homemade Gluten-Free Pizza Rolls
Making pizza rolls from scratch with gluten-free flour can feel tricky at first, but these tips will help you master it:
- Choose the right flour blend: A 1:1 gluten-free all-purpose flour with xanthan gum gives structure. Avoid single-flour mixes (like just rice flour).
- Keep hands oiled: Gluten-free dough sticks easily. Lightly oiling your hands prevents frustration.
- Don’t overfill: Too much sauce or cheese can make the rolls burst. Less is more when rolling.
- Use parchment paper: It helps you roll the dough without tearing.
- Let them cool slightly: Gluten-free dough continues to set as it cools, give it time to firm before eating.
For more comfort food options that use this same fluffy dough technique, try my Gluten-Free Chicken Taquitos or Gluten-Free Casseroles that keep weeknights simple.
Variations for Dietary Needs and Flavor Fun
The beauty of these rolls? They’re incredibly flexible. Here are some ideas to customize your Homemade Gluten-Free Pizza Rolls:
Gluten-Free & Dairy-Free Version
Swap mozzarella with shredded dairy-free cheese (like cashew or coconut-based) and use unsweetened almond milk. Add nutritional yeast for cheesy flavor.
High-Protein Option
Use cottage cheese in the filling or top rolls with slices of turkey pepperoni. You might enjoy these Mini Turkey and Cheese Pinwheels for lunchbox inspiration.
Flavor Boost Ideas
- Streusel topping? Not for pizza, but brush rolls with garlic butter and fresh parsley post-bake.
- Spice it up: Add red chili flakes to the sauce.
- Go gourmet: Use pesto, sun-dried tomatoes, and goat cheese for a grown-up twist.
If you’re craving more pizza flavors, I recommend checking out my Gluten-Free Chicago-Style Pizza or Pizza Gluten-Free Recipe, perfect for dinner parties.
How to Store and Reheat Gluten-Free Pizza Rolls
Gluten-free baked goods are best fresh but store surprisingly well with these steps:
Storage:
- Fridge: Store cooled rolls in an airtight container for up to 4 days.
- Freezer: Freeze rolls in a single layer on a tray, then transfer to a freezer bag. Good for 1–2 months.
Reheating:
- Oven: Reheat at 350°F for 8–10 minutes to restore crisp edges.
- Microwave: 30 seconds works, but texture is softer.
- Air fryer: 3–5 minutes brings back that perfect crust.
Want a dessert after your savory roll snack? You’ll love my Dairy-Free Gluten-Free Chocolate Cake or Mini Gluten-Free Vegan Apple Muffins to round things out.
FAQs About Homemade Gluten-Free Pizza Rolls
1. Can I make the dough ahead of time?
Yes! Prepare and refrigerate the dough for up to 24 hours. Let it come to room temp before rolling.
2. What’s the best gluten-free flour for pizza dough?
Look for a blend labeled “1:1 for baking” with xanthan or guar gum. I avoid bean-based blends, which taste earthy.
3. Can I bake these in a muffin tin?
Absolutely. It helps the rolls hold shape and creates golden crusts all around.
4. Do they taste like traditional pizza rolls?
Yes—cheesy, saucy, soft in the center with crispy edges. Most people can’t tell they’re gluten-free!
Conclusion: A Fall Favorite You’ll Make All Year
Homemade Gluten-Free Pizza Rolls are more than just a comfort food, they’re a connection to my roots, reimagined for the way I live and feel best today. Whether you’re avoiding gluten for health or flavor, these rolls prove there’s nothing “less than” about gluten-free baking.
They’re perfect for cozy weekends, back-to-school lunches, or a casual get-together. Once you master the technique, you’ll find new ways to make them your own, just like I did.
Buon appetito, my friends. And remember, from my gluten-free kitchen to yours, no compromises. Just flavor, joy, and tradition.