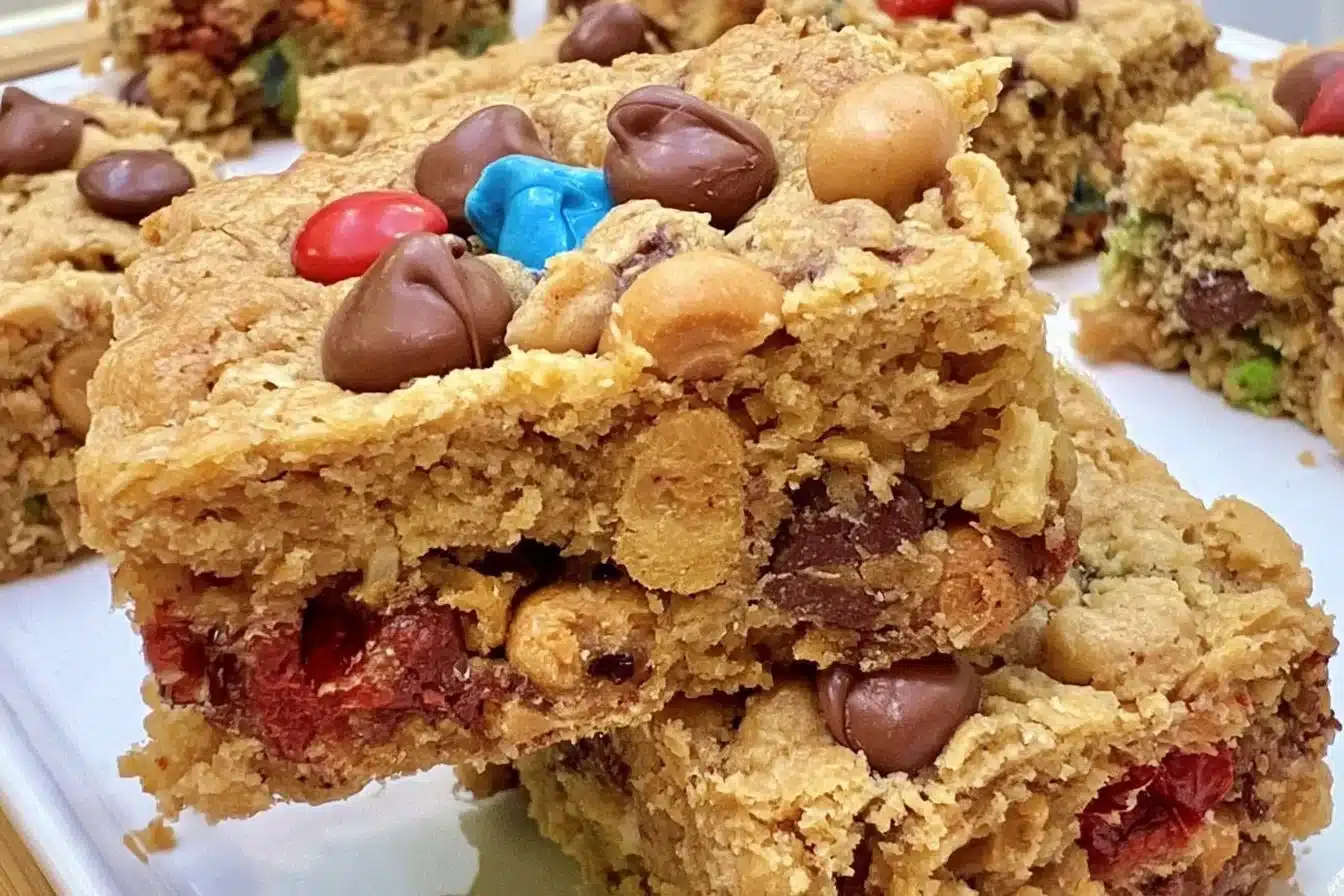
Gluten-Free Monster Cookie Bars: A Cozy Fall Favorite
As the leaves turn golden and the air becomes crisp, there’s nothing quite like baking a batch of Gluten-Free Monster Cookie Bars to bring joy and warmth into your home. These delightful treats are not only delicious but also a favorite among friends and family for their chewy texture and loaded flavors. Imagine sinking your teeth into a bar brimming with oats, chocolate chips, and the delightful crunch of peanut butter – the perfect cozy snack for chilly afternoons! If you’re interested in similar treats, you might want to also explore these gluten-free chocolate chip cookies that are a breeze to make.
Ingredients List
To make these delicious Gluten-Free Monster Cookie Bars, you will need the following ingredients: You may also find Chocolate Gluten Free Brownie Cookies Easy Homemade Treats useful.
- 1 cup creamy peanut butter
- 1 cup brown sugar
- 1/2 cup granulated sugar
- 2 large eggs
- 1 teaspoon vanilla extract
- 1 1/2 cups gluten-free rolled oats
- 1 teaspoon baking soda
- 1/2 teaspoon salt
- 1 cup chocolate chips (dark or semi-sweet)
- 1/2 cup M&M’s (optional for color and fun!)
Step-by-Step Instructions
Here’s how to create your mouthwatering Gluten-Free Monster Cookie Bars: You may also find Gluten Free Back To School Breakfast Bars Easy Recipe Guide useful.
Preheat Your Oven: Start by preheating your oven to 350°F (175°C) and greasing a 9×13 inch baking dish or lining it with parchment paper for easier removal.
Mix Wet Ingredients: In a large bowl, combine the creamy peanut butter, brown sugar, granulated sugar, eggs, and vanilla extract. Mix well until creamy and fully incorporated.
Combine Dry Ingredients: In another bowl, whisk together the gluten-free rolled oats, baking soda, and salt. Gradually add this dry mixture to the wet ingredients, stirring until just combined.
Fold in Extras: Gently fold in the chocolate chips and M&Ms, ensuring they are evenly distributed throughout the batter.
Bake the Bars: Pour the batter into your prepared baking dish, smoothing it evenly. Bake for about 20-25 minutes, or until the edges are golden and a toothpick inserted into the center comes out clean.
Cool and Cut: Allow the bars to cool in the pan before transferring them to a cutting board. Cut them into squares and enjoy!
Tips for Success
To make your baking experience smooth and successful, consider these helpful tips:
- Measure Ingredients Accurately: For the best results, use a kitchen scale to measure your ingredients, especially the peanut butter and sugars.
- Don’t Overmix: When combining dry and wet ingredients, mix just until combined to keep your bars soft and chewy.
- Customize Your Bars: Feel free to add nuts or other mix-ins based on your preference. For an even more decadent treat, try adding a layer of brownie batter on top before baking.
Possible Variations
If you’re feeling adventurous, here are a few variations of Gluten-Free Monster Cookie Bars you might enjoy:
- Streusel Topping: For added crunch, consider sprinkling a streusel topping made of gluten-free flour, oats, and brown sugar on top before baking.
- Different Flours: Experiment by using almond flour or coconut flour for a different flavor and texture.
- Nut-Free Version: Substitute sunflower seed butter for peanut butter to create a delicious nut-free option. You could also try these gluten-free sugar cookies for an alternative treat.
Storage Recommendations
To keep your Gluten-Free Monster Cookie Bars fresh, store them in an airtight container at room temperature for up to a week. If you’d like to keep them longer, these treats freeze well! Simply wrap the bars in plastic wrap and store them in a freezer-safe bag for up to three months. When you’re ready to enjoy them, thaw them at room temperature or give them a quick zap in the microwave.
Conclusion
There’s nothing better than a warm, gooey monster cookie bar to share with loved ones during autumn. The delightful flavors and simple preparation will surely make these bars a staple in your fall baking repertoire. For more creative baking ideas, check out this recipe for No Flour Monster Cookie Bars, which are perfect for those looking for a unique twist!
FAQs
1. Can I replace peanut butter with another nut or seed butter?
Yes, you can absolutely substitute peanut butter with almond or sunflower seed butter for different flavors or for nut-free options.
2. How can I ensure my cookie bars do not turn out dry?
To avoid dryness, be careful not to overbake them. Check for doneness a few minutes before the full baking time is up and remove them once the edges are golden.
3. Can I use rolled oats that aren’t labeled gluten-free?
If you’re baking for someone with a gluten intolerance or celiac disease, make sure to use certified gluten-free oats, as traditional oats may be contaminated with gluten.
4. What can I add to make these cookie bars even more decadent?
Consider adding crushed pretzels for a salty crunch or swirls of melted chocolate or caramel for an extra indulgent treat!
Gluten-Free Monster Cookie Bars
Ingredients
Wet Ingredients
- 1 cup creamy peanut butter
- 1 cup brown sugar packed
- 1/2 cup granulated sugar
- 2 large eggs
- 1 teaspoon vanilla extract
Dry Ingredients
- 1 1/2 cups gluten-free rolled oats
- 1 teaspoon baking soda
- 1/2 teaspoon salt
Mix-ins
- 1 cup chocolate chips (dark or semi-sweet)
- 1/2 cup M&M's optional for color and fun
Instructions
Preparation
- Preheat your oven to 350°F (175°C) and grease a 9x13 inch baking dish or line it with parchment paper.
- In a large bowl, combine the creamy peanut butter, brown sugar, granulated sugar, eggs, and vanilla extract. Mix well until creamy.
- In another bowl, whisk together the gluten-free rolled oats, baking soda, and salt. Gradually add this dry mixture to the wet ingredients, stirring until just combined.
- Gently fold in the chocolate chips and M&M's.
Baking
- Pour the batter into the prepared baking dish, smoothing it evenly.
- Bake for about 20-25 minutes, or until the edges are golden and a toothpick inserted into the center comes out clean.
Cooling and Serving
- Allow the bars to cool in the pan before transferring them to a cutting board.
- Cut them into squares and enjoy!