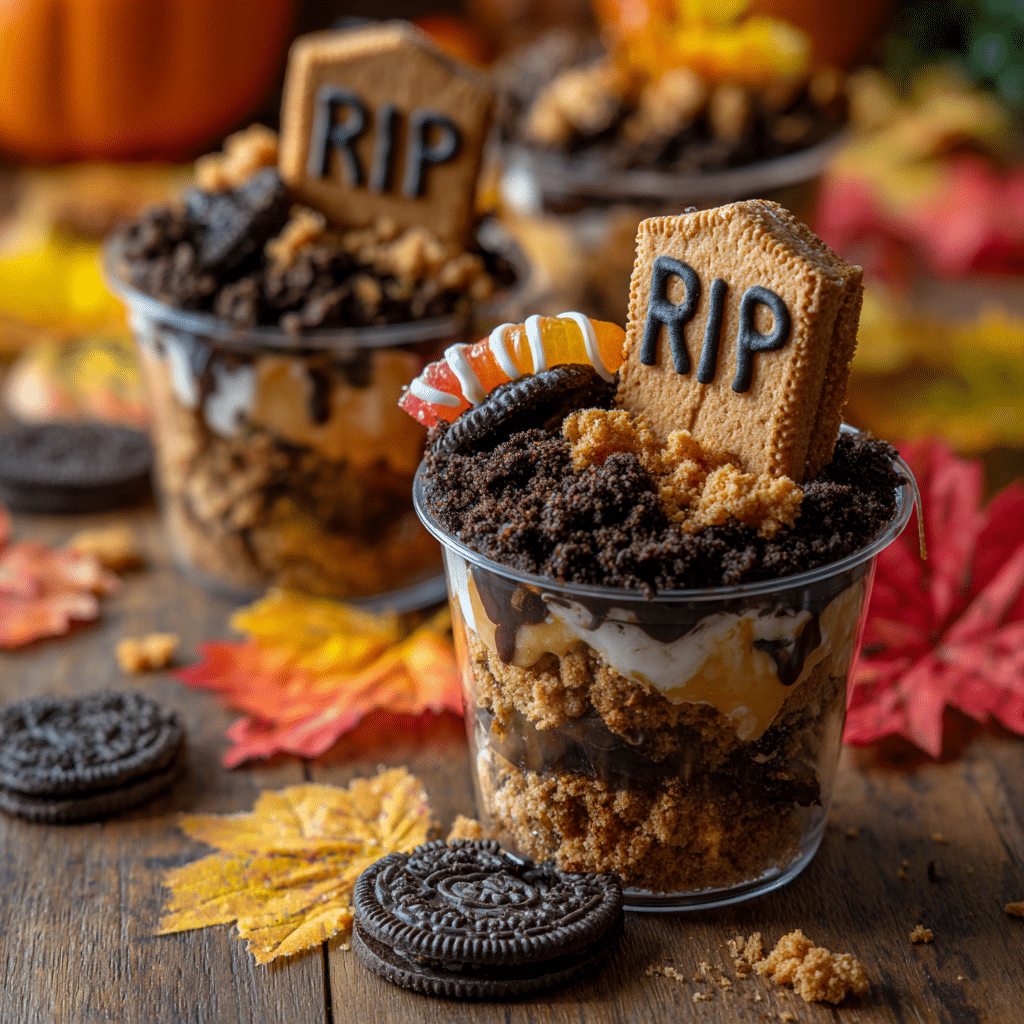
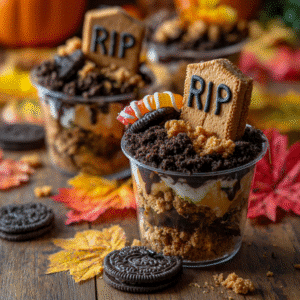
As the air turns crisp and the scent of cinnamon drifts through the kitchen, fall invites us to slow down and savor the season. For me, October has always meant two things: cozy weekends spent baking, and a playful countdown to Halloween. These Graveyard Pudding Cups are the best of both worlds. They’re cute, kid-friendly, and ridiculously simple no oven required.
Whether you’re planning a Halloween party or just want a fun dessert for movie night, this is a treat that always gets a reaction. The layers of creamy chocolate pudding and crushed cookies make a rich, satisfying base. And the fun comes in decorating: tombstone cookies, gummy worms, and candy pumpkins make each cup a little spooky masterpiece.
In this post, I’ll walk you through everything: ingredients, steps, tips, creative variations (including gluten-free options), and how to prep them ahead of time. They’re also ideal for making with kids just like my chocolate mousse or no-bake cheesecake bites.
Graveyard Pudding Cups
Equipment
- mixing bowl
- whisk
- spatula
- measuring cups
- Zip bag or food processor (for crushing cookies)
- Clear serving cups
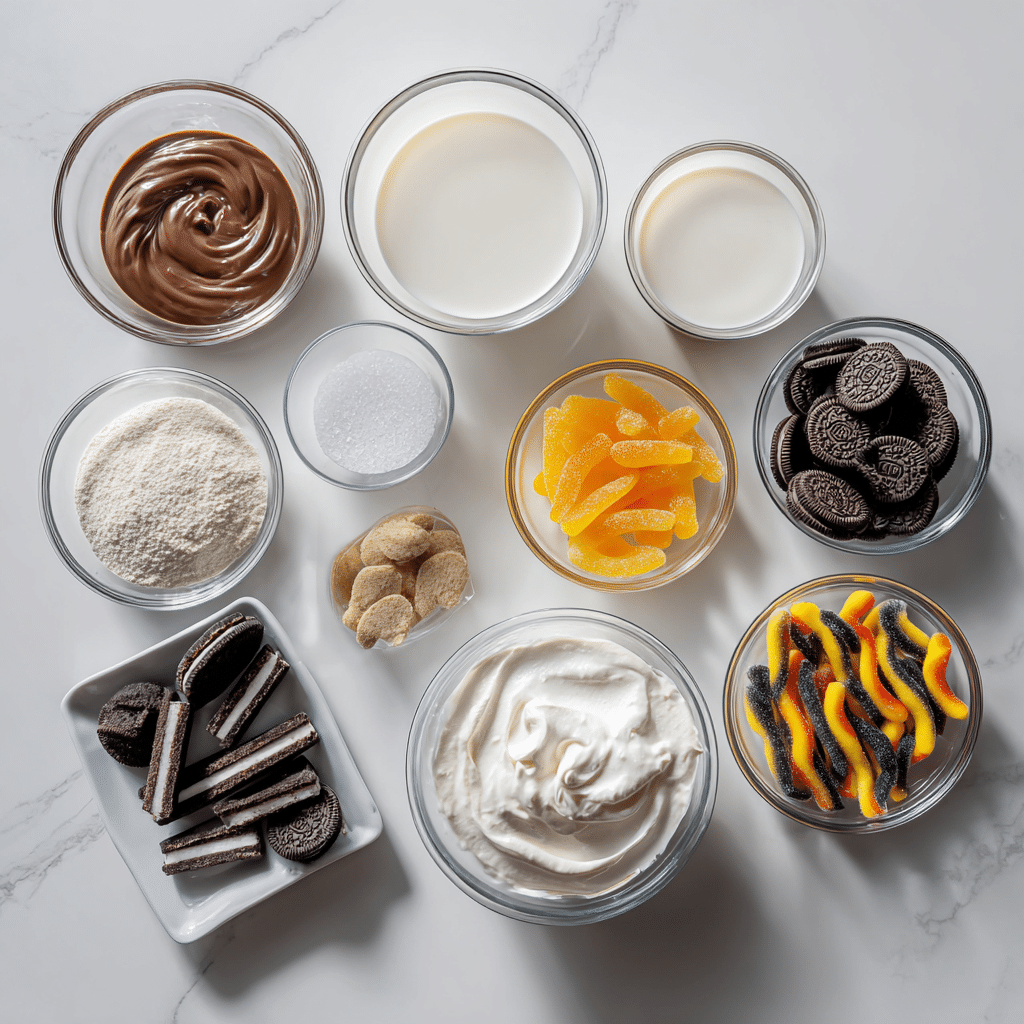
Ingredients
- 1 package (3.9 oz) chocolate instant pudding mix
- 2 cups cold milk
- 1 cup whipped topping (Cocowhip or Truwhip)
- 10 chocolate sandwich cookies, crushed (GF if needed)
- 6–8 clear plastic cups (8–9 oz)
- 6–8 rectangular cookies for tombstones (GF if needed)
- Edible gel or frosting (for writing RIP)
- Optional decorations: gummy worms, candy pumpkins, Halloween sprinkles
Instructions
- Whisk pudding mix with 2 cups cold milk in a bowl for 2 minutes. Let sit 5 minutes to thicken.
- Fold whipped topping into pudding gently with a spatula until combined.
- Spoon pudding mixture into clear cups, filling each about 3/4 full.
- Crush sandwich cookies and sprinkle a thick layer on top of each cup.
- Use gel or frosting to write RIP on each tombstone cookie. Insert upright into cups.
- Decorate with gummy worms, candy pumpkins, or sprinkles as desired.
Notes
Nutrition
Ingredients for Graveyard Pudding Cups
These pudding cups come together with just a few pantry staples. Here’s what you’ll need:
- 1 package (3.9 oz) chocolate instant pudding mix
- 2 cups cold milk
- 1 cup whipped topping (like Cocowhip or Truwhip)
- 10 chocolate sandwich cookies, crushed (gluten-free if needed)
- 6–8 clear plastic cups (8–9 oz)
- 6–8 rectangular cookies for tombstones (use GF if needed)
- Edible gel or frosting for writing “RIP”
- Optional decorations: gummy worms, candy pumpkins, Halloween sprinkles
Make it gluten-free:
Use certified GF pudding mix and cookies. Schär shortbread cookies work great as edible tombstones. If you like easy gluten-free baking, you’ll also enjoy my shortbread cookies and banana bread.
Step by Step Instructions
This recipe is no-bake and kid-approved. From start to finish, it takes about 20 minutes.
1. Make the pudding
Whisk pudding mix with 2 cups of cold milk in a mixing bowl for 2 minutes. Let it sit for 5 more to thicken.
2. Fold in whipped topping
Use a spatula to gently fold the whipped topping into the pudding. This adds a light, mousse-like texture.
3. Fill the cups
Spoon the pudding mixture into your clear plastic cups, filling them about three-quarters full.
4. Make the “dirt” layer
Crush sandwich cookies in a sealed zip bag with a rolling pin or by pulsing in a food processor. Sprinkle a generous layer of crumbs on top of each cup.
5. Add tombstones
Use edible gel or frosting to write “RIP” on each cookie. Insert one into each cup. It should stand upright in the pudding.
6. Decorate
Add gummy worms, candy pumpkins, or spooky sprinkles. For a festive twist, check out my Halloween cupcake frosting techniques.
Tips for Success
- Choose the right cups: Clear plastic cups make the layers visible and more fun.
- Don’t overmix: Fold whipped topping gently to keep the pudding fluffy.
- Chill before serving: A 30-minute chill helps the pudding set and flavors meld.
- Decorate just before serving: This keeps cookies crisp and decorations vibrant.
Want more no-fail desserts? My mochi brownies and truffle pops are always hits.
Creative Variations
Here are some fun ways to personalize your Graveyard Pudding Cups:
Gluten-Free Version
- Use gluten-free pudding mix (most chocolate Jell-O mixes are GF).
- Choose GF sandwich cookies and shortbread for toppings.
- Enjoy Life and Schär are great brands.
You can also try crushed gluten-free cake pops for a sweet twist.
Streusel Dirt (Instead of Cookies)
Want a homemade topping?
Mix:
- 1/2 cup almond flour
- 2 tbsp brown sugar
- 2 tbsp melted butter
Bake at 350°F for 8 minutes until golden. Let cool, then crumble over pudding for a nutty, crisp topping.
Pumpkin Spice Cups
Replace chocolate pudding with pumpkin pudding and use crushed GF graham crackers on top. Add cinnamon sprinkles and tiny ghost candies for a fun fall variation.

Storage Tips
These pudding cups store well, making them perfect for parties and meal prep.
- Refrigerator: Store assembled cups covered with plastic wrap for up to 2 days.
- Decorations: Add gummies and tombstones just before serving for best texture.
- Make ahead: You can prep the pudding and crushed cookies a day early.
They’re as make-ahead friendly as my overnight oats with berries.
FAQ: Graveyard Pudding Cups
How long do they last in the fridge?
Up to 2 days. For best results, add decorations right before serving.
Can I make this dairy-free?
Yes! Use plant-based milk and dairy-free whipped topping. Several pudding mixes are vegan too.
What cookies work best as tombstones?
Rectangular shortbread-style cookies that are sturdy enough to stand in pudding. Gluten-free options like Schär or homemade work great.
Can I serve these at room temperature?
They’re best chilled, but they’ll hold up at room temp for about 1–2 hours on a party table.
Conclusion
These Graveyard Pudding Cups are the kind of recipe that delivers big on fun with minimal effort. They’re spooky, delicious, and easy enough for a weeknight activity with kids or a showstopper for your Halloween party spread. With a few tweaks, they fit any dietary need, including gluten-free and dairy-free.
Looking for more fall desserts? Don’t miss my gluten-free apple crisp or lemon bars for a tart contrast to all that chocolate.